Category Archives: Photo editing

Adding Texture to Photography

Credit: Chris Barbalis (Unsplash)

It’s hard to believe that it’s been so long since I last posted, but I’m back with this post about adding texture to photographs. The idea of adding texture to photographs has been an interest of mine for years. Over time I’ve taken several online classes both on how to make and on how to apply textures.

One of these classes was offered by Kim Klassen and I thoroughly enjoyed the class! Kim is a very talented photographer and artist. Happily, Kim is back with Texture Tuesday 2.0 this week. In her post she introduces a set of lovely mono grunge textures, and also a set of light and shadow overlays for download. In addition, she shares three videos with instructions on how to use the textures and the overlays. I urge everyone who is interested in textures to visit her website and download these assets!

Of course I wanted to experiment and play with the new textures. I opened up a still life photo from Unsplash to work with in Adobe Photoshop Creative Cloud. The process that I followed is described below.

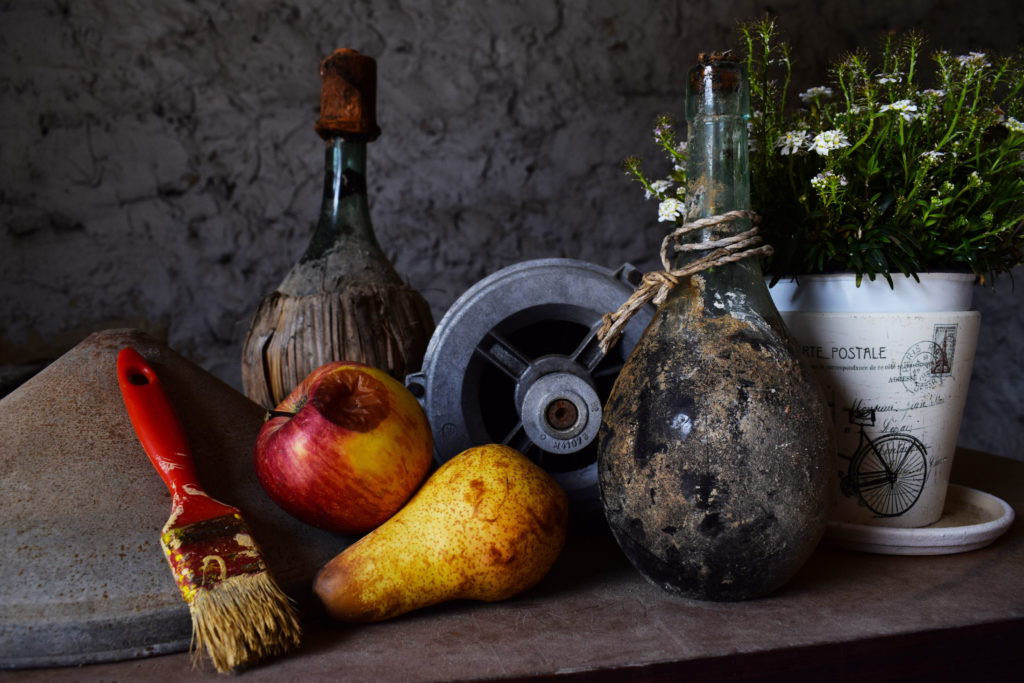
Here is the unedited photo:
Credit: Chris Barbalis (Unsplash)

As you can see, the image is rather dark but shows a fair amount of texture already. I decided to apply the 5.together texture from the collection and set the blend mode to Overlay. Also I lowered the opacity of the layer to 85%. Then I added a layer mask and painted over the white flower pot (on the right) so that it wasn’t too bright and distracting.
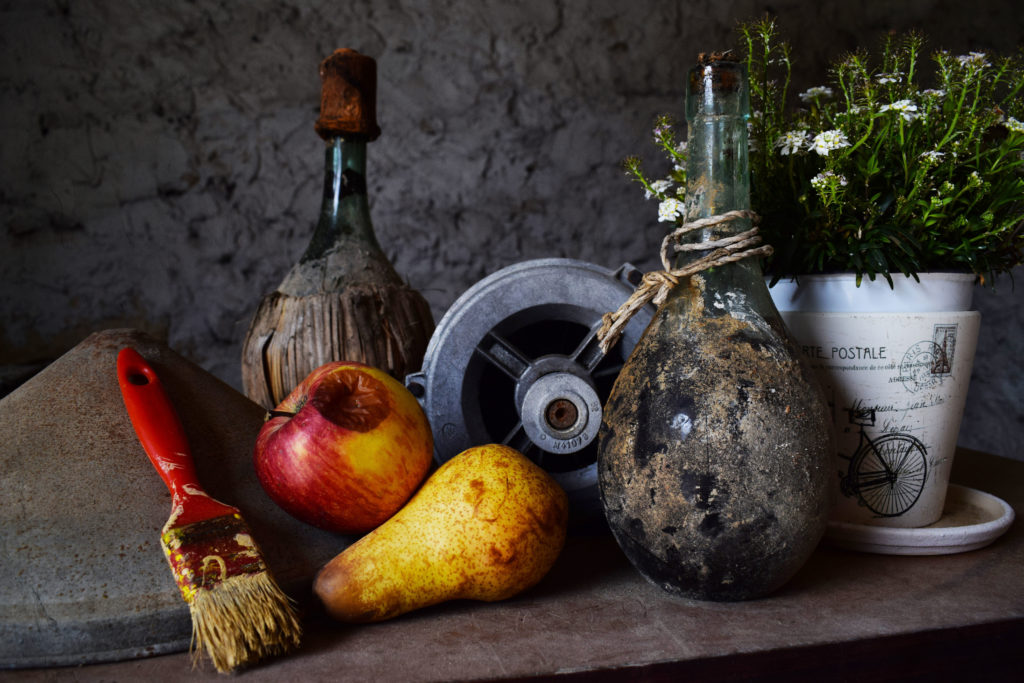
Photo with added texture

The effects of the applied texture are subtle, but the result is to brighten the objects in the photo and to bring out and enhance the various textures in the image.

It was a lot of fun to do and I look forward to playing more with the other textures!

Black and White Photos – Day One

Well, I couldn’t help but notice that various friends, colleagues, and family members of mine were posting black and white photos on Facebook for a seven day challenge.

I found many of their posts to be very beautiful and inspiring! As a result I became quite intrigued by the task at hand, and decided to jump into the fray.

I happen to believe that black and white photography can be truly amazing (for example, think of a photographic artist such as Ansel Adams, and others). Breathtaking work! Never underestimate the aesthetic impact of a purely tonal image! Nobody tagged me on Facebook to participate, but I decided to enter the challenge of my own accord.

Rules: No people, no explanation… and one photo per day (from my life).

Starting today, I will post one black and white photo for the next seven days. All of these are photos which were personally taken by me.  None contain any people. Further, they are all recent photos. Most were taken within the past two to six months or so; but I will include a couple of photos (which I really like) that I took in 2016.

I argue that if I take a photo then it IS a part of my actual life, yes? At the very least these are images that have some sort of personal resonance.

Day One

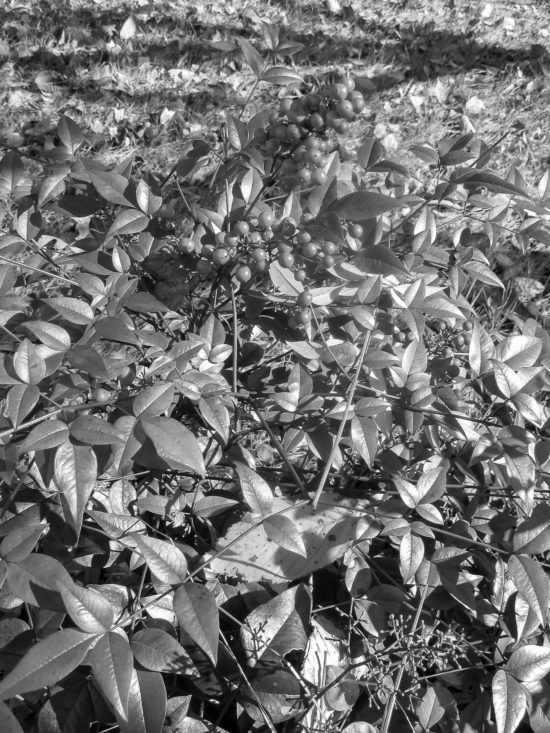
Nandina Plant with Berries


Jazz Fest 2016 in New Orleans

As a change of pace today’s post is a mini-travelogue. Recently my husband and I returned from attending Jazz Fest 2016 in New Orleans. This was our first time taking part in this major annual musical event. Also, it was the first time that we visited The Big Easy since the ravages of Hurricane Katrina. Prior to arriving we wondered what it would be like.

Since we spent most of our time at the fairgrounds (where Jazz Fest was located), at our Uptown hotel, and touring the French Quarter, we did not observe any obvious differences from past visits. At the festival we had a lot of fun listening to all of the music and sampling the delicious food which was available onsite.

Unfortunately, the weather did not cooperate with us while we were there. Even prior to flying down we were warned by my cousins to bring mud shoes and umbrellas due to the excessive rain. True to form it continued to rain a good bit throughout our visit. The fairgrounds were very muddy and it made things a bit challenging.

The second day was sunnier and hotter, but it was still very muddy at the festival. We were stalwart, but after a while the presence of mud everywhere began to wear a bit thin. So, we began to think of something else to do…

On our third day, John and I decided to skip Jazz Fest and to go see the sights in the French Quarter. We enjoyed a lovely lunch in the courtyard at The Gumbo Shop, and then later had café au lait and beignets at the Café du Monde! It was very enjoyable to roam through the Quarter and to take in the local ambiance.

As it turned out there were torrential rains that afternoon and also significant flooding occurred. As a result, the festival was forced to close early. We were glad that we decided to skip the festival and go tour the Quarter that day; but we also appreciate those who braved the elements to go to the festival too. Stevie Wonder was the final act and we understand that he tried mightily to carry on by singing through a megaphone.

Later that evening we reconvened at our hotel with my cousins. A fabulous poolside Happy Hour and dinner were enjoyed by all! My cousins brought a box of white wine to share, and we all ordered carry-out Po’ Boys from a nearby restaurant. We had the best time chatting and catching up and eating yummy local cuisine! It will definitely go down as a wonderful vacation memory for me.

Continue reading

Restoring An Ancestor’s Photo In Photoshop CC

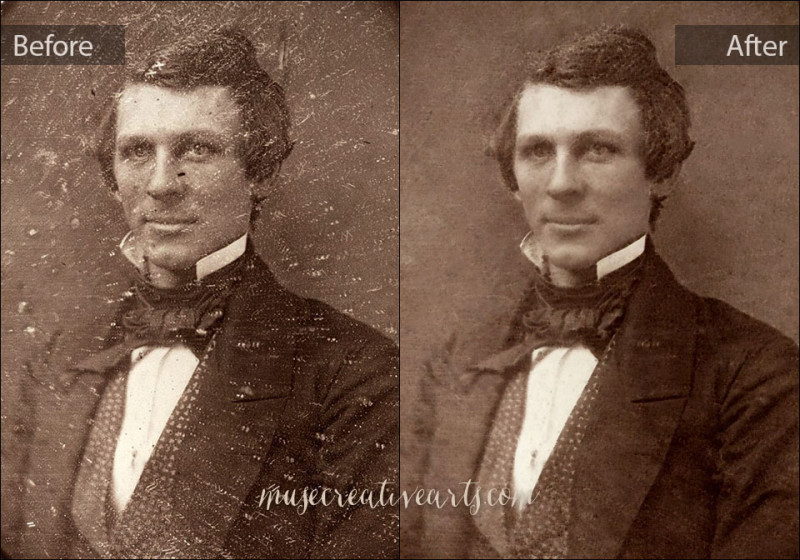
Restored heritage photo
Before/After Restored Photo

It’s been a while since I last made a post about photography. As I’ve mentioned elsewhere on the site, I’ve been learning how to retouch and restore photographs in Lightroom and Photoshop CC for some time now.

Having completed two online courses specifically about photo restoration, I wanted to test my skills in restoring an actual heritage family photo. The photo that I chose to work on is a copy of an ambrotype (a successor process to the better-known daguerreotype). This particular image is of my great-great-grandfather, Isaac (ca. 1850s). Thanks to my cousin Jon for the scan!

Continue reading

Lightroom Love

Today I am departing from the more familiar topic of Zentangles – although they are wonderful – to Photography.

I have mentioned elsewhere on the blog that I have been learning how to use Adobe Photoshop and Lightroom (Creative Cloud). My personal objective has been to learn how to edit photos to bring out the best in them (without looking “Photoshopped,” or artificial), as well as to be able to restore old or damaged photos.  I have a ton of old photos and slides that I inherited from my parents — not to mention that I have many of my own older photos that need some work. My goal is to digitize, repair/fix, and to be able to share these photographs with family and friends.

Continue reading